How to Mount NFC Tap Plates on Church Chairs: 3 Easy Options
You’ve got your NFC tap plates. Now where do they go? There are three mounting options, all included or available at no extra charge. The right choice depends on your chairs or pews, whether you own or rent your space, and how permanent you want the installation.
3M Adhesive Backing (Most Popular)
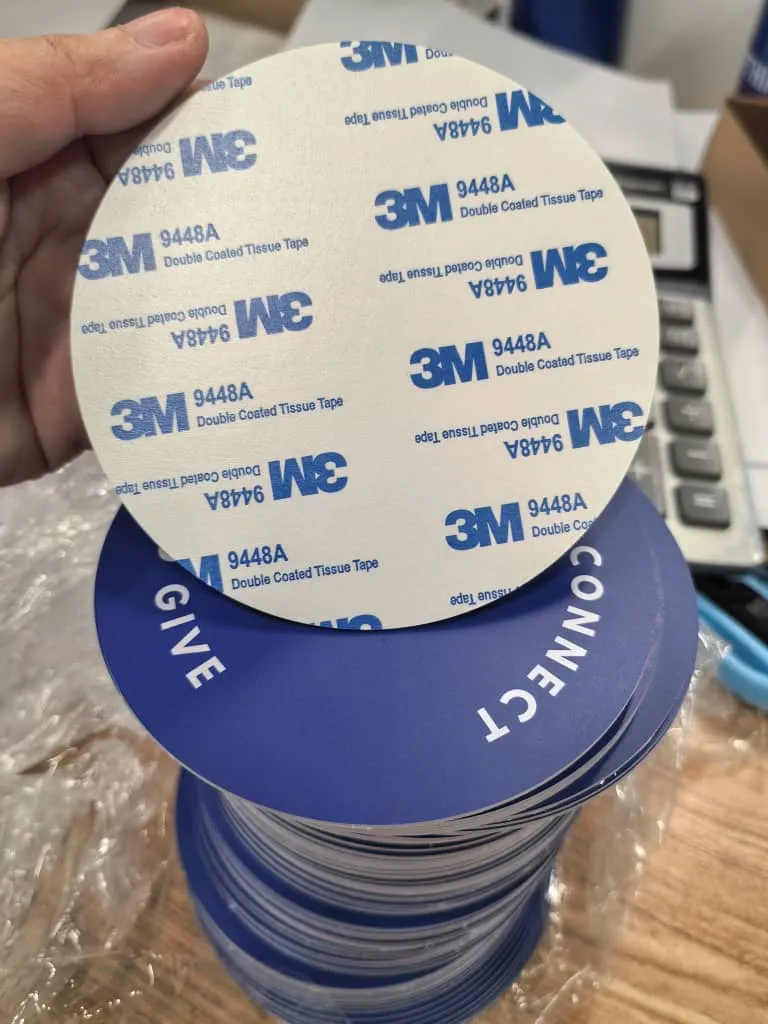
This is what most churches use, and for good reason. Every plate ships with professional-grade 3M adhesive already applied to the back. There’s nothing extra to order, nothing extra to buy. Peel, stick, done.
How to Install
Clean the surface with rubbing alcohol or a damp cloth
Peel the adhesive backing off the plate
Press firmly for 30 seconds. Done.
Best For
Pros
- Fastest install, literally seconds per plate
- Holds strong once applied
- No tools needed
- No damage to your furniture
Cons
- Difficult to reposition once stuck (the adhesive is strong by design)
Pro Tip
Clean the surface with rubbing alcohol first for the strongest bond. Avoid textured fabric surfaces, the adhesive works best on smooth, hard surfaces like finished wood, plastic, or metal.
Pre-Drilled Screw Holes
For churches that want a permanent, rock-solid mount. Tap.Giving can include pre-drilled holes in your plates so you can screw them directly into pew backs or chair arms. If your plates are going on wooden pews and you never want them to move, this is your option.
How to Install
Position the plate and mark holes with a pencil
Drill small pilot holes at your marks
Attach with small #4 or #6 wood screws
Tighten and you’re done
Screws not included, any #4 or #6 wood screw from the hardware store works. Pick up a box for a couple of dollars. That’s the only additional supply you’ll need.
Best For
Pros
- Most secure mount available
- Won’t shift or fall off, ever
- Clean, professional look
Cons
- Requires a drill and screws
- Leaves small holes if you remove the plates later
Pro Tip
Use screws with decorative heads, black or brass, to match your plate design. Always pre-drill pilot holes to avoid splitting the wood, especially on older pews.
Elastic Band Wrap
Perfect for churches that rent their space, use padded chairs, or don’t want to modify their furniture at all. The elastic band wraps around the chair back and holds the plate in place, no adhesive, no screws, no marks left behind.
How to Install
Slip the elastic band around the chair back
Slide the plate into position on the band
Adjust tension as needed. That’s it.
Best For
Pros
- Zero damage to furniture
- Completely removable and repositionable
- Great for weekly setup and tear down
Cons
- Slightly less “permanent” look
- Band may be visible depending on chair design
Pro Tip
Match the band color to your chair color, black bands on dark chairs, white on light, for a cleaner look. The bands stretch to fit most standard church chair widths.
Which Option Is Right for Your Church?
Here’s a quick decision guide. Find your situation on the left, and the recommended mounting option is on the right.
| Your Situation | Recommended Option |
|---|---|
| Own your building + wooden pews | Adhesive or Screws |
| Own your building + chairs | Adhesive |
| Rent your space | Elastic Band |
| Set up and tear down weekly | Elastic Band |
| Want the fastest install | Adhesive |
| Want the most permanent mount | Screws |
| Want zero furniture damage | Elastic Band |
Not Sure?
Most churches start with the included 3M adhesive. It’s strong enough for permanent use but doesn’t require any tools or modifications. You can always request pre-drilled holes or elastic bands later if your needs change. View pricing to see all mounting options.
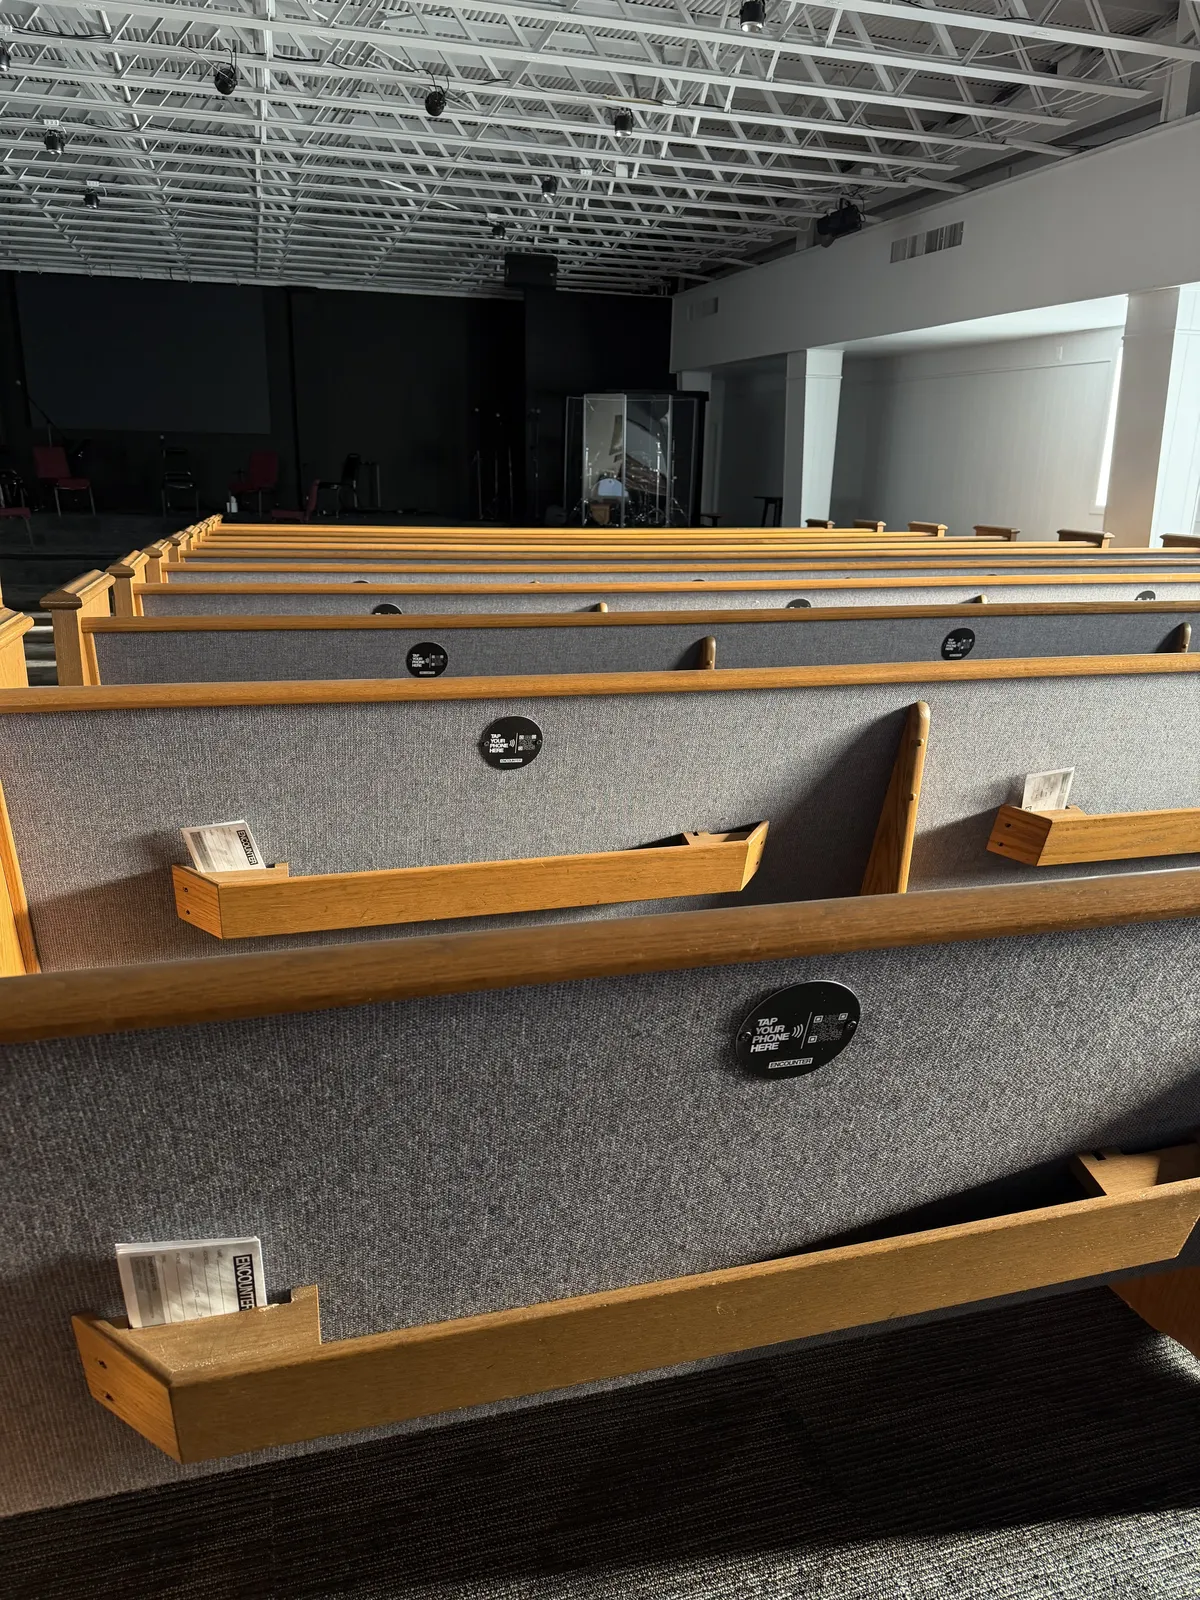
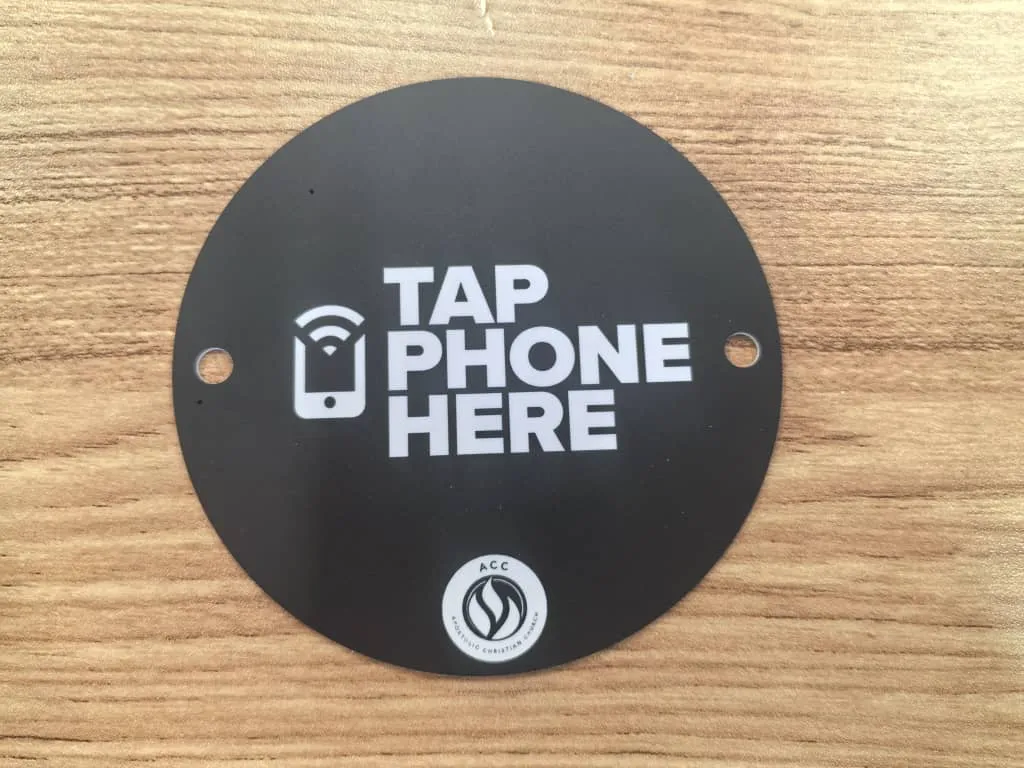
Tap.Giving plates mounted on pew backs with 3M adhesive, clean, professional, and within easy reach
Placement Tips: Where on the Chair?
You’ve picked your mounting method. Now, where exactly should the plate go? The NFC read range is about 1–2 inches, so the plate needs to be somewhere congregants can easily tap their phone against it.
Back of the Chair or Pew
Most common placement. Mount the plate on the back of the chair or pew in front of the congregant. They see it at eye level when seated, natural and easy to reach.
RecommendedPew Top or Chair Arm
Works well for pews with a flat top rail or chairs with wide armrests. The plate sits within arm’s reach, making it a natural spot for a quick tap.
On the Offering Plate Itself
Some churches embed the NFC chip directly into a traditional offering plate. When the plate is passed, congregants can drop in cash or tap their phone, same familiar moment, new option.
Near Exit Doors
Mount a plate on the wall or a stand near exit doors for “give on the way out.” Great for people who missed the offering moment or want to give after the service.
NFC Read Range
The NFC chip reads at about 1–2 inches. That means the plate needs to be accessible for phone contact, not tucked behind a hymnal holder or buried under a seat cushion. As long as someone can comfortably hold their phone near the plate, it’ll work.
Ready to Mount Your Plates?
All plates include 3M adhesive backing. Pre-drilled holes or elastic bands can be requested at no extra charge when you place your order.
Questions? Email hello@tap.giving or call (832) 510-8788.